How to Stamp and Paint Fill Wedges
How to Video Tutorial to Stamp and Paint Fill Wedges
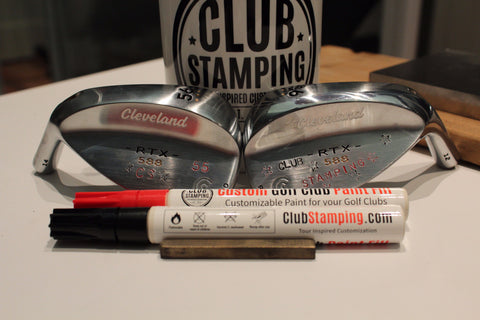
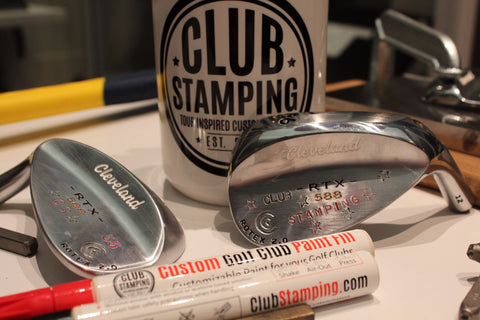
Paint Filling Golf Clubs
Paint filling your golf clubs is perhaps the easiest and most impact-full change you can make to your golf clubs. From freshening up the stock paint fills to completely overhauling your golf clubs color-way, the paint fill on your golf clubs is the first thing that people normally notice.
Below are the simple and easy steps to get you started personalizing and customizing the paint fills on your golf clubs.
How to Paint Fill Golf Clubs
What you will need:
- Acetone/ nail polish remover/ alcohol swabs
- Paper towels/ rags
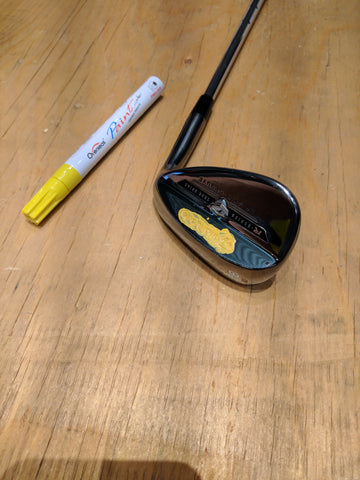
- Custom Paint Fills
- Club Clamp
- Safety gloves
- Safety eye wear
- Safety clothing/ apron
The Steps:
- Gather all the required items.
- Put on your safety gloves and protective eye wear as well as protective clothing.
- Clean the golf club with your alcohol based solution, acetone, or alcohol swabs. Having a clean surface for your paint fills is essential to ensuring that the paint fill sticks.
- Apply your Custom Paint Fills to the filling areas, following your desired color scheme and theme. Get all 12 Custom Paint Fills for an endless ability to personalize and customize all of your golf clubs and even your friends' clubs!
- Wait 10-20 minutes. Let the paint cure for at least 20 minutes.
- Using the acetone/ nail polish remover/ alcohol based liquid, wipe the excess paint off. Only a little pressure is required and a painting motion is best used. A paper towel soaked in acetone will be the fastest method but also the most likely to remove the paint fill. Alcohol swabs are the best and cleanest method, switching swabs every wipe and every color to ensure less smudging and paint "run". If you choose the paper towel method, use quick strokes and allow some time between wipes to prevent the paint from becoming too thin!
- Clean up the fines areas and let the paint cure for the next few days to ensure that it is fully set.
Stamping Your Wedges
Stamping your golf clubs is a very easy and straight forward task that many can join in on. A few easy steps are outlined below to help you get started. For live examples of how the best in the business stamp their clubs, search "golf club stamping" on youtube. We are currently working on our very own "how to" video at the moment and will be airing it shortly.
Stamping Designs
Content coming soon...
How to Stamp your Wedges
What you need?
- 25 minutes (approx.)
- Golf clubs
- 4lb hammer
- Sturdy table with a decent sized lip
- Small piece of plywood (to protect the table)
- Golf Club Stamps
- Custom Paint Fill
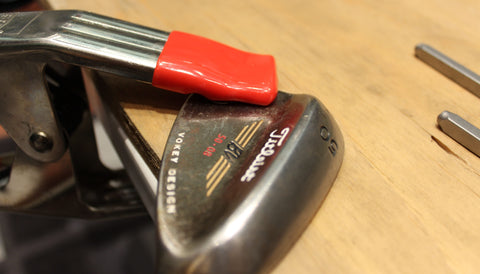
- Club Clamp
- Acetone/ nail polish remover/ alcohol swab
- Protective eye wear
- Protective gloves
- Painters Tape (optional)
Before you start stamping your golf clubs, we recommend practicing on several old clubs to get the hang of yielding the hammer and striking the stamps properly. We find the 2-3 old clubs is enough to begin getting the hang of it but more may be required.
The Steps
- Securely clamp your golf club to the table by placing the Club Clamp over the lip of the table with the optional piece of plywood under it. The plywood will help protect your table as well as absorb some of the impact.
- (optional) Place painters tape on the back side of the club to allow you to mark where you want the stamps to go and how much space the stamping will take up.
- Secure your golf club under the Club Clamp on top of the plywood with the Wedge Stamping Anvil. Make sure that the hosel of the golf club is not resting against the edge of the wood or the table. The last thing you want is to have lines on your hosel!
- Select your stamps. Here is where you will mark your tape with the length of the stamps being used. This allows you to plan where you can place your stamps and phrases.
- Put on your protective eye wear.
- Begin stamping! The less hits the better here. Ideally 1-2 hits is all it takes. Confidence is very important here. Allowing the 4lb hammer to do most of the work is a good tip here, you just have to help it accelerate into the back of the stamp. It is no different than driving a nail into a dense piece of wood.
- Once you are done stamping, remove the club and the tape residue from the golf club.
- Still wearing your protective eye wear, place on your protective breathing apparatus and rubber gloves.
- Take your desired Custom Paint Fill colors and first follow the steps on the side of the pen, "burping" the gasses, then shaking, then drawing the paint out.
- "Color" in your stamp impressions by drawing small, tight circles over each letter.
- Let the paint dry for 15-20 minutes (12-24 hours with several coats throughout for optimal results)
- With almost no pressure, wipe a cotton tip covered in acetone/ nail polish remover to remove the excess. Be careful not to press too hard as you will remove the paint from the stamp impressions. Change tips when changing color removal and when too much paint is on it.
- Paint will cure entirely over the next couple days. You don't want to get any sand or dirt in the paint until it is entirely cured.
Our very own detailed "how to" video is coming shortly. If you have any questions or would like a more indepth, personalized how to description, please feel free to reach us on our "contact us" page. You can find it in the website header or down below in the website footer "quick links" section.
You're now ready to start looking like a PRO!
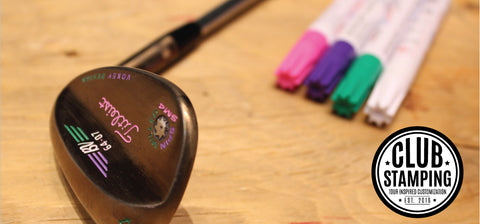
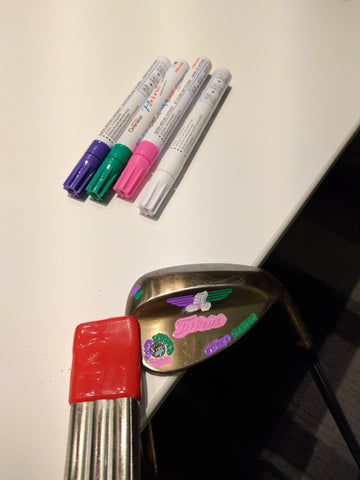
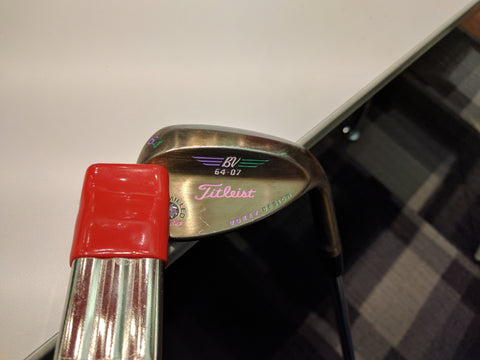
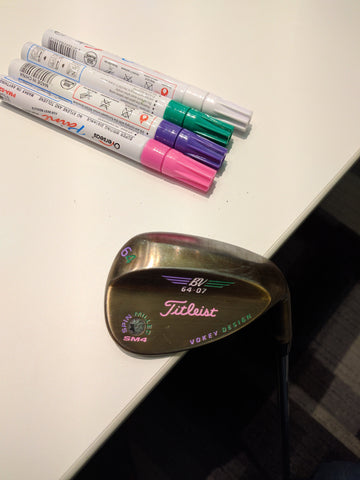
A custom stamped wedge done right at home following the steps above:
The entire process can be as fast as 90 seconds and up to 25 minutes including letting the paint dry if you are first starting out. A full set of stamped wedges and paint filled golf clubs is possible in 20 minutes flat!